PHPUnit is an automated testing framework for PHP and Magento 2 supports it out of the box with PHPUnit. As a good software engineer, one must consider writing their code by following the Test Driven Development a.k.a. TDD approach so in this quick tutorial, I will briefly explain the idea of PHP Unit Testing and why is important to follow TDD.
What is Unit Testing?
Unit Testing simply refers to testing every individual component/unit of a software. The objective is to ensure and validate that each unit of the software you are writing performs as designed. A unit is the smallest testable part of your application that usually accepts one or a few inputs and mostly a single output. One of the benefits of Unit testing is that this process is fully automated and does not require man hours to review and test the code.
Why Unit Test?
There are several benefits of Unit Testing but the key three benefits are as follow:
Early problem detection
Have you just created a beautiful software but one or more sections do not work in production? If yes then welcome to Unit Testing using which we can find the problems early in the development cycle.
Facilitates Change
Is there a new version of the programming language available and the version in which you wrote your software been deprecated? No problem – Unit testing allows you to refactor code or upgrade system libraries at a later date, and make sure the module still works correctly. The idea of unit testing is to write test cases for all functions so if a change causes a fault, it can be quickly identified.
Design
Ok I am not talking about your website frontend design or the flashy colours here. I’m instead referring to Design Patterns of your software. Unit Tests are to be written prior to the implementation of the actual code, and this approach helps a developer to think through the design and the end goal before the development begins.
Enough of the theory .. now let’s move on and create a simple Unit Test for your Bespoke Magento Module.
Write a unit test in Magento 2
Let’s assume that you have created a simple Magento 2 module called Shoman_MyFirstModule; that has its configuration area in Store > Configuration (say Shoman > My First Module), and in the configuration area you have a dropdown with Yes/No value.
Your module has a Helper Class called Data.php with a method called isEnabled(). The content of the file is as follows:
<?php
/**
 * Copyright © Shoaib Rehman All rights reserved.
 * See COPYING.txt for license details.
 */

namespace Shoman\MyFirstModule\Helper;

use Magento\Framework\App\Helper\AbstractHelper;

class Data extends AbstractHelper
{

    /**
     * @param \Magento\Framework\App\Helper\Context $context
     */
    public function __construct(
        \Magento\Framework\App\Helper\Context $context
    )
    {
        parent::__construct($context);
    }

    /**
     * @return bool
     */
    public function isEnabled()
    {
        return $this->scopeConfig->getValue('shoman/general/enabled',
            \Magento\Store\Model\ScopeInterface::SCOPE_WEBSITE);
    }
}
As you can see in the code above, we have simple function that pulls and returns the value of the custom configuration.
Next, we are going to create a Unit Test for this Helper Class.
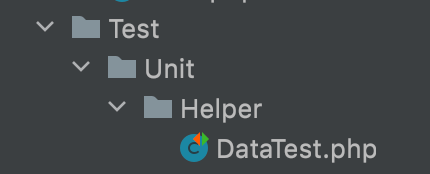
In your custom module root, create a new directory Test/Unit/Helper; and since your Helper class is called Data.php so create a new file called DataTest.php in the path app/code/Shoman/MyFirstModule/Test/Unit/Helper. Your directory structure will look like the one in the image below:
DataTest.php will extend \PHPUnit\Framework\TestCase and have two functions:
- setUp() – treat it as a __construct() function
- testIsEnabled() – isEnabled() is the original function in the Data.php class. We have prefixed the original function name with test so we can run a Unit Test on it.
Your test file will look like this:
<?php

namespace Animed\OneTrust\Test\Unit\Helper;

class DataTest extends \PHPUnit\Framework\TestCase
{
    /**
     * Helper
     *
     * @var \Shoman\MyFirstModule\Helper\Data
     */
    protected $helper;

    /**
     * Scope config mock
     *
     * @var \Magento\Framework\App\Config\ScopeConfigInterface|\PHPUnit_Framework_MockObject_MockObject
     */
    protected $scopeConfigMock;

    /**
     * @var \Magento\Framework\TestFramework\Unit\Helper\ObjectManager
     */
    protected $objectManagerHelper;

    public function setUp() : void
    {
        $this->objectManagerHelper = new \Magento\Framework\TestFramework\Unit\Helper\ObjectManager($this);
        $className = \Shoman\MyFirstModule\Helper\Data::class;
        $arguments = $this->objectManagerHelper->getConstructArguments($className);
        /**
         * @var \Magento\Framework\App\Helper\Context $context
         */
        $context = $arguments['context'];
        $this->scopeConfigMock = $context->getScopeConfig();
        $this->helper = $this->objectManagerHelper->getObject($className, $arguments);

    }

    public function testIsEnabled()
    {
        $this->scopeConfigMock->expects($this->once())
            ->method('getValue')
            ->willReturn('1');

        $this->assertTrue(is_string($this->helper->isEnabled()));
    }
}
How to run the Unit Test for a single Module in Magento 2?
To perform Unit Tests for a single module, you will need to run the following command in the Magento root directory:
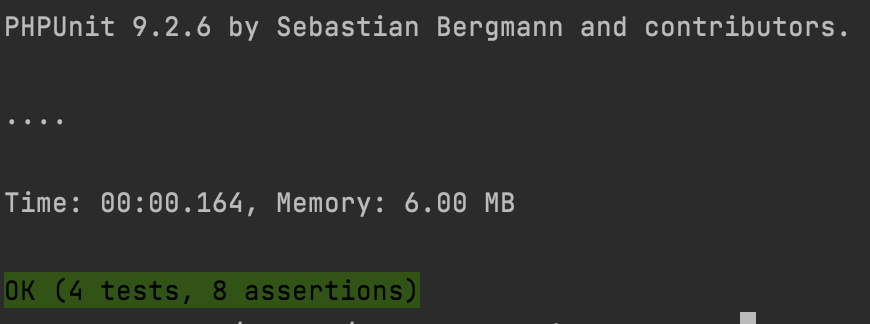
php vendor/phpunit/phpunit/phpunit -c dev/tests/unit/phpunit.xml.dist app/code/Shoman/MyFirstModuleOnce the test has run, and provided it has passed, you’ll get a message similar to in the screenshot below:
or if your test has failed then you will get an error message like the one below:

.. that’s all. If you have any questions or comments, please let me know.