How To Disable Low Disk Space Checks In Windows
The steps below apply to Windows 10, Windows 8, Windows 7, Windows Vista, and Windows XP.
- Open Registry Editor.
- The steps for opening Registry Editor are a little different in some versions of Windows, so follow that link above if you need specific help.
- However, no matter which version of Windows you’re using, this command, when used from the Run dialog box (Windows Key + R) or Command Prompt, will open it right up
-
regedit
- Locate the HKEY_CURRENT_USER folder under Computer and click the expand sign (either (+) or (>) depending on your Windows version) to expand the folder.
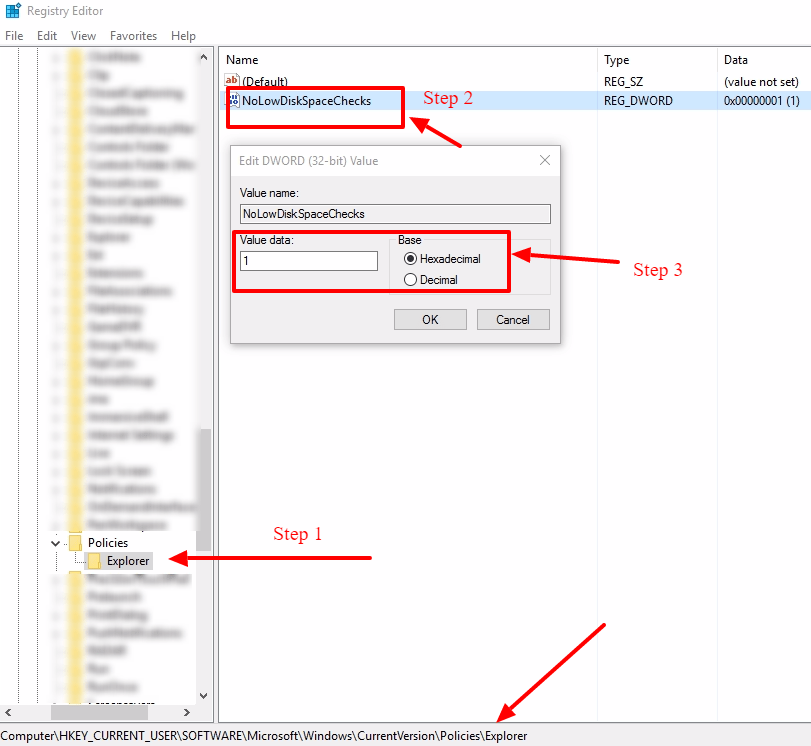
- Continue to expand folders until you reach the HKEY_CURRENT_USER\Software\Microsoft\Windows\CurrentVersion registry key.
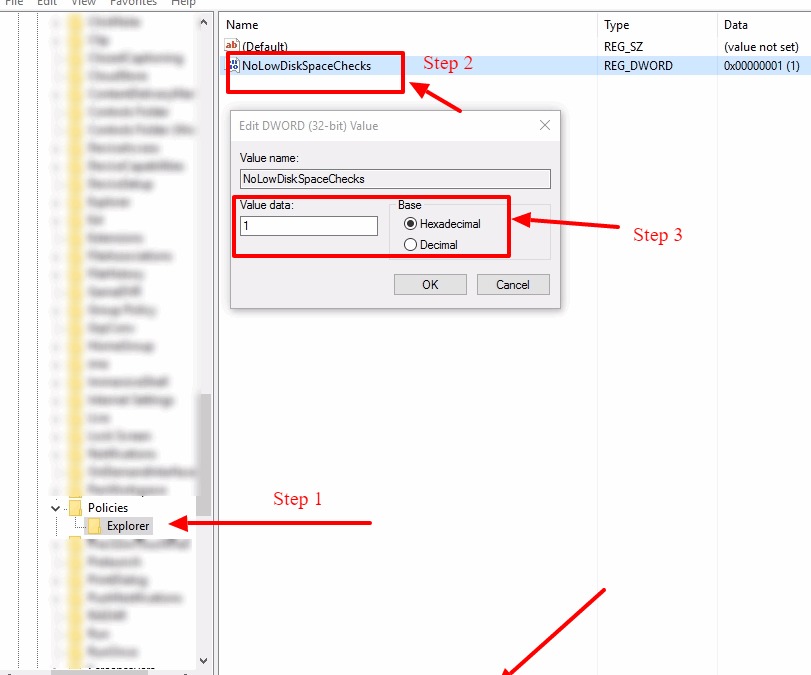
- Select the Policies key under CurrentVersion.
- From the Registry Editor menu, choose Edit, followed by New, followed finally by Key.
- Rename the new created New Key #1 to Explorer and Save(or Hit Enter).
- With the new key, Explorer, still selected, choose Edit, followed by New, followed finally by DWORD (32-bit) Value.
- After the DWORD is created beneath Explorer, it will initially be named New Value #1.
- Change the name of the DWORD to NoLowDiskSpaceChecks by typing it exactly as shown, and then hitting the Enter key.
- Right-click on the new NoLowDiskSpaceChecks DWORD you just created and choose Modify.
- In the Value data: field, replace the zero with the number 1.
- Click OK and close Registry Editor.
- Windows will no longer warn you about low disk space on any of your hard drives.